One of my fondest memories as a kid was taking my wilderness survival merit badge in Scouts.
We were split up into two teams and had to build a shelter that we would sleep in for the weekend.
I remember the feeling of accomplishment and the excitement of sleeping in what amounted to a big pile of leaves and pine needles.
Today I recognize the importance of the knowledge that I acquired years ago.
I routinely practice these skills and pass them down to my daughter. In this article, I will show you several simple shelters that are essential to perfecting your survival skills.
What is a Survival Shelter?
A survival shelter is nothing related to comfortable. Rather, it’s a shelter that keeps you alive and serves other basic purposes like cover from the rain, sun, and other harsh conditions.
It allows you to hide from wild animals, sleep, and store food and water.
Why Build a Survival Shelter?
If you ever got lost in the woods or are facing an apocalypse, then the first thing you’ll have to do is to build a shelter. This is important to get everything together and safe. It is recommended to construct a shelter even before you get food and water.
It keeps you safe from the outside environment like the heatwaves and cold waves.
It will keep you dry during winter and snow.
It will be a place to safely keep your supplies and food.
It acts as a barrier from predators and poisonous insects.
It may not sound exciting at this time. But you need to understand that without a shelter, you’ll be exposed and there’s a good chance that you suffer from hypothermia. Then it won’t be long till your circulatory system stops and you die.
The Quintze (Quinzhee) Hut
This simple igloo-type shelter, if built properly, can be heated to above freezing on a 20-below day by just body heat.
Light a candle and you can further increase the interior temperature. Follow these 4 steps to building a Quintze Hut:
Pile snow to a depth of about 8 inches. Pack down firmly to make the floor.
Make a pile of branches or leaves. Pile snow on top and pack firmly. This will create a cavity that you will dig out.
Tunnel through the mound at opposite ends to dig out the branches and leaves you added in step 2, close one entrance with snow, then crawl inside to shape the interior. Ideally, the Quintze should be narrow at the foot end, with a bed long enough to lie down on and just tall enough at the head end for you to sit up. The walls and roof need to be at least a foot thick (check this with a stick).
Poke out an air vent overhead and dig a well at the entrance for the cold air to settle into. Cut a snow block for a door. Glaze interior walls with a candle to prevent dripping.
Open / Lean-to Shelter
Bough structures that reflect a fire’s warmth are the most important shelters to know how to build.
They can be erected without tools in an hour, provided you are in an area with downed timber, less if you find a makeshift ridgepole such as a leaning or partly fallen tree to support the boughs.
Wedge a ridgepole into the crotches of closely growing trees (one end can rest on the ground if necessary), or support each end of the ridgepole with a tripod of upright poles lashed together near the top.
Tilt poles against the ridgepole to make a framework. To strengthen this, lace limber boughs through the poles at right angles.
Thatch the lean-to with slabs of bark or leafy or pine-needle branches, weaving them into the framework. Chink with sod, moss, or snow to further insulate.
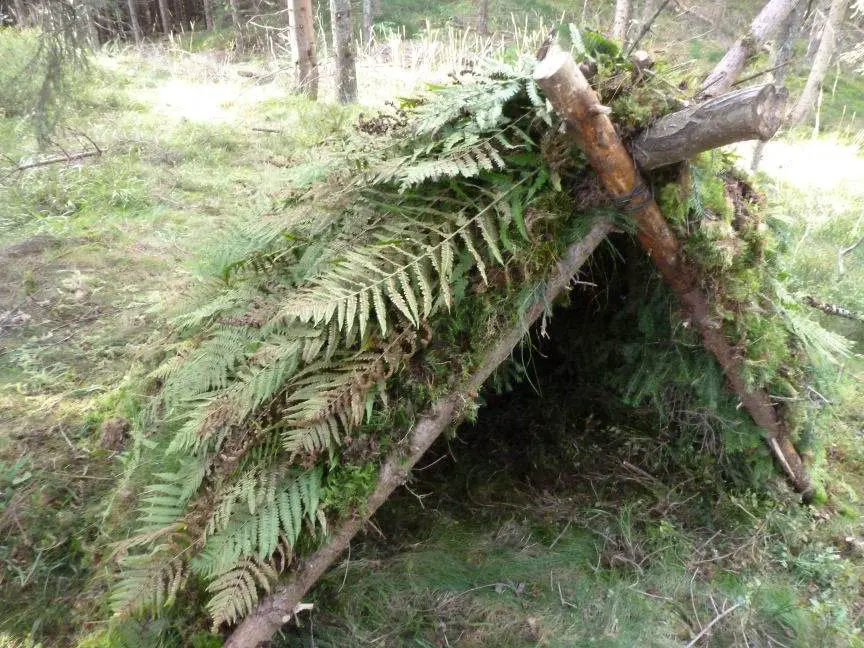
A-Frame Shelter
The pitched roof of the A-frame bough shelter offers more protection against the wind than a lean-to and can still be heated by a fire at the entrance.
One drawback is that the occupant can’t lie down parallel to the fire for even warmth.
Lift one end of a log and either lash it or wedge it into the crotch of a tree. Tilt poles on either side to form an A-frame roof.
Strengthen and thatch the roof as you would a bough lean-to.
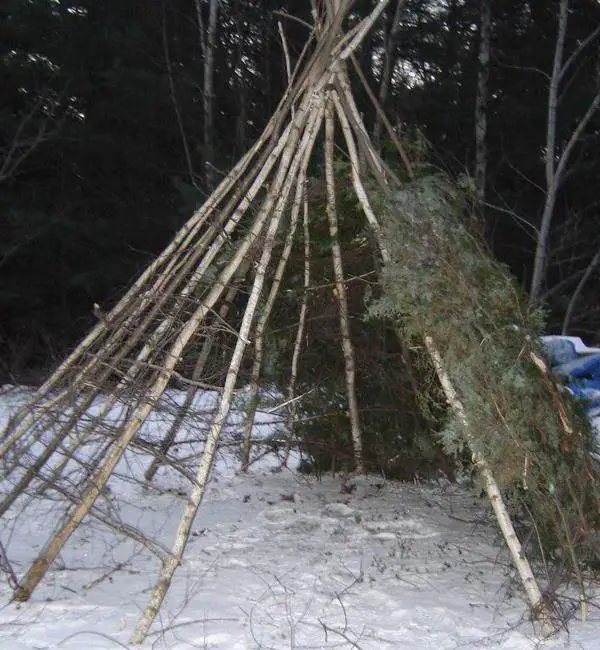
Wikiup
This forerunner of the tepee remains the quintessential primitive shelter – sturdy enough to blunt prevailing winds, weatherproof, quickly built for nomadic hunters, but comfortable enough to serve as a long-term home.
It can be partially enclosed or fully enclosed and vented to permit an inside fire.
Tilt three poles together in tripod form and bind them together near the top. If you can find one or more poles with a Y at one end, tilt the others against the crotch, eliminating the need for cordage.
Tilt other poles against the wedges formed by the tripod in a circular form and thatch, leaving a front opening and a vent at the top for smoke.
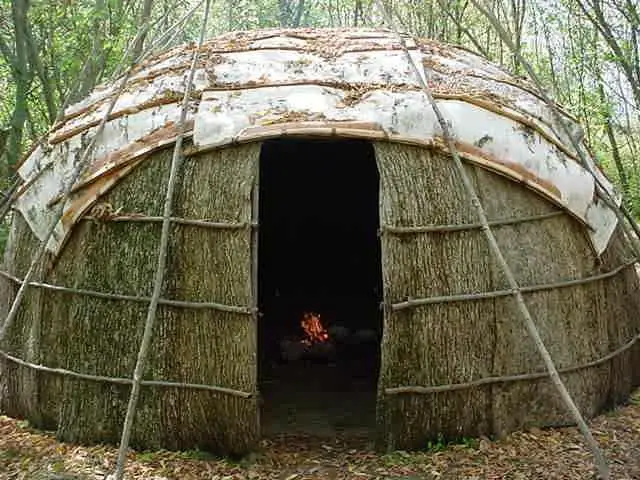
Wigwam
A complex version of the wickiup, this is built with long, limber poles bent into a dome-shaped framework to maximize interior space.
Inscribe a circle and dig holes at 2-foot intervals to accommodate the framing poles.
Drive the butt ends of the poles into the holes and bend the smaller ends over the top. Lash or weave the tops together, forming a dome-shaped framework.
Lace thin green poles horizontally around the framework for rigidity.
Thatch the framework, leaving entrance and vent holes.
Building a Survival Shelter
I found this video on Facebook, and I must say, I was blown away.
If you are looking for a practical way to build a survival shelter, you really need to check this out. Feel free to share!