Table of Contents
A cattle guard is an essential tool for livestock management, especially for those who keep cattle on large pastures or open ranges.

It serves as a barrier to prevent livestock from leaving designated areas while allowing vehicles to pass freely without the need for gates.
The design leverages the natural reluctance and inability of hoofed animals to step on unstable or uneven surfaces, thereby preventing them from crossing.
Safety Considerations for Both Cattle and Humans
While cattle guards are designed to deter animals, they must also be safe for both livestock and humans.
Poorly designed or improperly installed cattle guards can lead to injuries. They should be clearly visible and marked to avoid accidents.
Economic Benefits of Installing a Cattle Guard
Installing a cattle guard offers several economic benefits. It eliminates the need for manual labor to open and close gates, saving time and effort.
Moreover, it reduces the risk of livestock escaping and potentially causing damage or getting lost, which can result in financial loss.
Planning Your Cattle Guard
Assessing Your Needs and Requirements
Before you start building a cattle guard, it’s crucial to assess your needs and requirements. This involves determining how many cattle guards you need and where they should be installed.
You also need to consider the type of vehicles that will be passing over the cattle guard, as this will impact its size and load-bearing capacity.
Choosing the Right Location for Installation
The location of your cattle guard is critical. It should be installed where it can effectively control the movement of your cattle.
Common locations include entrances and exits to pastures, near buildings, or along fence lines.
The ground at the chosen location should be stable enough to support the cattle guard and the weight of any vehicle that might pass over it.
Determining the Suitable Size and Load Capacity
The size of your cattle guard will depend on the width of the pathway where it will be installed. It should be wide enough to prevent cattle from going around it.
The load capacity depends on the type of vehicles that will be passing over it.
A cattle guard for light vehicles like cars and pickups needs to be less robust than one meant for heavy vehicles like trucks and tractors.
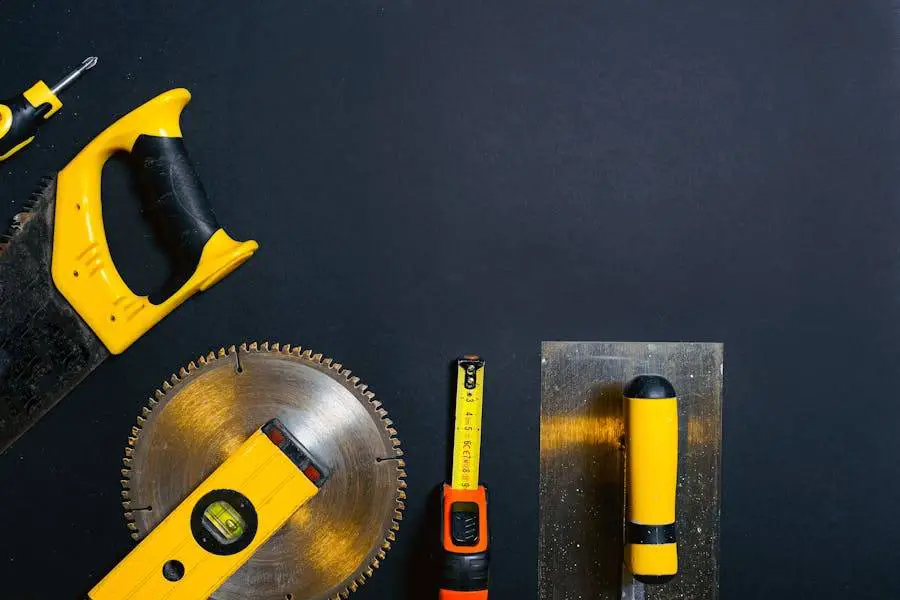
Gathering Necessary Materials and Tools
List of Essential Materials for a DIY Cattle Guard
Building a cattle guard requires several materials. These include:
- Steel Pipes
- Steel Angles
- Concrete
- Gravel
- Greenhouse Plastic or Polyethylene Greenhouse Film (optional)
Remember, the specific quantity of these materials will depend on the size and design of your cattle guard.
Selecting the Right Tools for the Job
You’ll need the following tools:
- Measuring Tape
- Level
- Square
- Saw
- Welder
- Shovel
- Gloves
- Safety Glasses
- Steel-Toe Boots
- Welding Helmet (if welding is involved)
Safety Equipment Needed During Construction
Safety is paramount when working on a project like this.
Make sure you have gloves to protect your hands, safety glasses to shield your eyes from sparks or debris, steel-toe boots to protect your feet, and a welding helmet if you’re going to be doing any welding.
A first aid kit should also be kept nearby in case of any minor injuries.
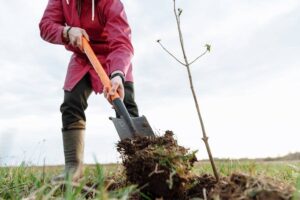
Preparing the Site
Clearing and Levelling the Ground
Before you start building your cattle guard, you’ll need to prepare the site.
Marking Out the Area for Your Cattle Guard
Once the site is clear and level, you’ll need to mark out the area for your cattle guard. Use your measuring tape and some marking paint to clearly outline the area.
Digging the Trench for Installation
The next step is to dig a trench where the cattle guard will be installed. The trench should be slightly larger than the cattle guard to allow for adjustments and backfilling.
Building the Frame

Cutting the Materials to the Right Dimensions
After gathering your materials, you’ll need to cut them to the right dimensions.
Use your measuring tape and a marker to measure and mark the steel angles for the frame. Then, use your saw to cut along the marked lines.
Assembling the Frame Components
With your materials cut to the right dimensions, you can start assembling the frame.
Arrange the steel angles to form a rectangle, with the longer pieces forming the length and the shorter pieces forming the width.
Then, use your welder to join the corners together. Make sure the frame is square by measuring diagonally from corner to corner.
Creating a sturdy, well-assembled frame is crucial for the durability and effectiveness of your cattle guard. Here’s a step-by-step guide on how to assemble the frame components:
- Measure and Cut: Begin by taking precise measurements for the frame based on your cattle guard design. This will typically be the width of the roadway or path where you plan to install it. Once you have these measurements, use a saw or angle grinder to cut your steel angles to the appropriate lengths.
- Lay Out the Frame: Lay out the cut steel angles in the shape of your frame on a flat, level surface. You should have two parallel pieces for the length (sides) and two pieces for the width (ends). Check the corners with a square to ensure they are at right angles.
- Weld the Corners: With your steel angles laid out, begin welding the corners together to form the rectangular frame. Be sure to double-check that everything is square before you start welding. It’s also important to ensure that your welds are strong and thorough as this frame needs to withstand significant weight.
- Add Cross Members: Measure and cut your steel pipes to fit within the frame. These will serve as cross members. The number of cross members you need and the spacing between them will depend on your design and the size of your cattle guard.
- Attach Cross Members: Weld the cross members to the frame. They should be evenly spaced across the entire length of the frame. Make sure each cross member is level before welding it in place. It’s important to create strong welds here as the cross members bear the load of the cattle and vehicles crossing the guard.
- Check Your Work: After all the cross members are attached, check over your work. Ensure that all welds are solid and that the frame is square. The cross members should be level and evenly spaced.
Ensuring the Structural Integrity of the Frame
It’s crucial that your frame is strong and sturdy. After welding the corners, consider adding additional support in the form of cross braces.
These can be made from smaller pieces of steel angle and welded diagonally across the corners of the frame.
Installing the Cross Members
Measuring and Cutting Cross Members
The cross members are the horizontal bars that form the actual barrier of the cattle guard. These need to be cut to the same length as the width of the frame.
Use your measuring tape and marker to measure and mark the steel pipes, then cut them with your saw.
Affixing Cross Members to the Frame
With your cross members cut to the right length, you can start attaching them to the frame. Lay the cross members across the frame at regular intervals.
The spacing between the cross members should be wide enough to deter cattle but not so wide that their feet could get stuck.
Once you’re happy with the arrangement, use your welder to secure the cross members to the frame.
Checking Alignment and Spacing
After all the cross members have been attached, check the alignment and spacing. All cross members should be parallel, and the spacing should be even.
If necessary, make adjustments by cutting or adding cross members, or moving them to achieve the desired spacing.
Setting the Cattle Guard into the Ground
Preparing the Trench for Installation
Before you can install your cattle guard, you’ll need to prepare the trench. This involves ensuring that the trench is the right size and that the bottom is flat and level.
You might also want to pour a small layer of concrete at the bottom of the trench to provide a stable base for the cattle guard.
Here’s a step-by-step guide on how to prepare the trench:
- Mark the Area: Start by marking the area where you plan to dig the trench. This should be the same width and length as your cattle guard frame.
- Dig the Trench: Using your marked outline as a guide, begin digging the trench. The depth of the trench will depend on your specific design, but it should be deep enough to accommodate the cattle guard and a layer of concrete
- Level the Bottom: Once the trench is dug, the bottom must be leveled and compacted to provide firm support for the cattle guard.
- Prepare the Catch Basin (If Applicable): If your design includes a catch basin for drainage, this should be prepared at this stage.
- Install the Concrete Base: Pour a layer of concrete into the bottom of the trench. This provides a solid base for the cattle guard to rest on.
- Set the Height: After pouring the concrete, make sure to set the appropriate height for the cattle guard.
- Allow Concrete to Cure: Give the concrete ample time to cure before proceeding with the installation of the cattle guard.
Lowering the Cattle Guard into the Trench
With the trench prepared, you can lower the cattle guard into it. This will require at least a couple of people, depending on the size of the cattle guard.
Be careful not to damage the cattle guard or injure yourself during this process.
Securing the Cattle Guard in Place
Once the cattle guard is in the trench, it needs to be secured in place. This can be done by pouring concrete around the edges of the cattle guard. Make sure the cattle guard is level before the concrete sets.
Backfilling Around the Cattle Guard
Selecting the Right Backfill Material
After the cattle guard is installed and the concrete has set, you’ll need to backfill around it. The backfill material should be compactable and drain well.
Gravel is a good choice as it meets these criteria and also provides a firm surface for vehicles to drive on.
Process of Backfilling Around the Cattle Guard
Backfilling involves adding the backfill material around the cattle guard and compacting it.
Start by adding a layer of gravel around the cattle guard, then compact it using a hand tamper or a mechanical compactor.
Continue this process until the area around the cattle guard is level with the surrounding ground.
Ensuring Stability After Backfilling
Once you’ve finished backfilling, check the stability of the cattle guard. It should be firmly embedded in the ground and not move when weight is applied.
If necessary, add more backfill material and compact it until the cattle guard is stable.
Finishing Touches and Aesthetic Considerations
Painting or Coating the Cattle Guard
To protect your cattle guard from rust and corrosion, consider applying a coat of paint or another type of protective coating. This will not only extend the life of your cattle guard but also improve its appearance.
Adding Reflective Markers for Visibility
For added visibility, especially at night, consider adding reflective markers to your cattle guard.
These can be attached to the frame and will reflect the headlights of vehicles, making the cattle guard easier to see.
Landscaping Around the Cattle Guard
Finally, you might want to do some landscaping around your cattle guard. This could involve planting grass or other vegetation, or adding decorative elements like rocks or flowers.
Not only does this improve the appearance of the cattle guard, but it also helps to blend it into the surrounding environment, making it less intrusive.
Conclusion
Building a cattle guard can be a challenging but rewarding DIY project.
By following these steps, you can create an effective barrier that keeps your cattle safe and contained while also allowing easy access for vehicles.
Just remember, safety comes first – both for you during construction and for your livestock and vehicles once the cattle guard is in use.