Replacing Saddle Valve With Sharkbite [Full Guide]
by
Table of Contents
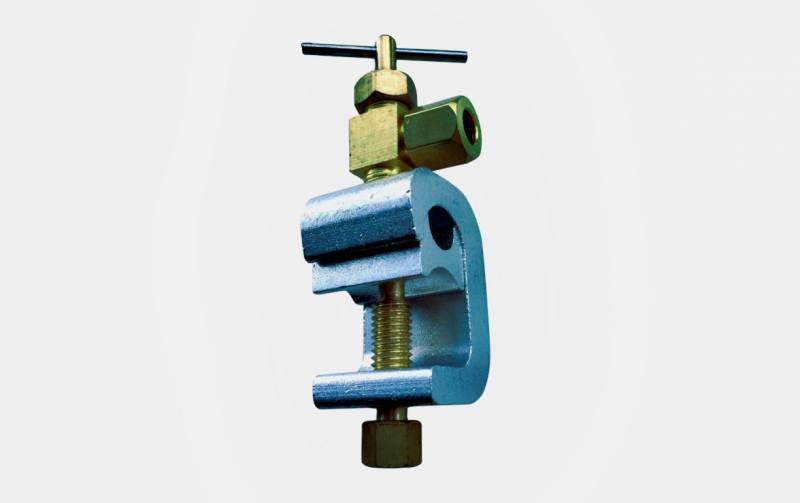
If you’ve interacted with saddle valves before then, you are well aware of three things. They are cheap, easy to install, and, unfortunately, highly unreliable. Yes, saddle valves are not that reliable.
If you are among those keen on replacing saddle valves, then you are at the right place. Why? Well, this post highlights the process of replacing the saddle valve with Sharkbite.
Before jumping into the process of replacing the saddle valve with Sharkbite, it is important to address a few key things.
Why Not Replace The Old Saddle Valve?
Why Sharkbites Valves Over Saddle Valves
What Type of Tubing Work With Sharkbites Valves?
Why Not Replace the Old Saddle Valve With a New Saddle Valve?
For instance, why not replace a faulty old saddle valve with a new one. The answer to this question is simple: as already pointed out, a saddle valve is not reliable.
Even if you get a new one, the probability of it failing is exceptionally high. Think of Sharkbite as something better. It is the best way to go because you’ll likely have to deal with it just once.
Why Sharkbites Valves Over Saddle Valves?
One of the many benefits of using a Sharkbite valve is the fact that they are re-useable.
However, despite this fact, re-use them with caution because a re-used Sharkbite tends to have scratches here and there, but the scratch won’t necessarily be deep enough.
Another positive associated with Sharkbites is fitting. The installation process of Sharkbites is very simple.
In fact, they are push-to-connect fitting grip pipes and tubing that feature a ring of teeth that helps seal connections and prevent leaks.
Another reason why Sharkbites are better than saddle valves is longevity. Unlike saddle valves, Sharkbites valves last a long time.
In fact, when used with Sharkbites tubing, Sharkbites can last for more than 25 years.
What Kind of Tubing Can SharkBite Fittings Be Used With?
Equally important to point out or know the answer to is the kind of tubing Sharkbite valves are used with.
That aid they are rated copper and CPVC. Simply put, they work best with copper. This, however, doesn’t mean that they cannot be used on plastics.
Still, on what works best with Sharkbites, it is worth pointing out that PEX tubing is up there.
However, a tube stiffener is required if you use it with PEX tubing. Failure to do so might result in the tubing giving way due to the tubes flexing.
Replacing Saddle Valve With Sharkbite
Now that we’ve answered a few crucial questions about Sharkbite valves, we can shift our attention to the process of replacing saddle valves with Sharkbites.
Requirements
Having the right tool in place increases the chances of you replacing the saddle valve with Sharkbite properly. That said, you’ll need the following when replacing the saddle valve with Sharkbite:
Disconnect Tongs
Tube Cutter/Hacksaw
Sand Paper
Ice Maker Fitting
Angle Stop
Coiled PEX Tubing
Service Slip Tee Adapter
Replacing Saddle Valve With Sharkbite: The Process
With the right tools in place, we can now replace the saddle valve with Sharkbite. To best highlight the process, well break it down in steps:
Step 1: Shut off The Main Valve
As with any other plumbing job, the first step is making sure that the main valve is completely shut off. Also, make sure that you open the faucet.
The whole point of shutting off the main valve is to empty the pipes in your home. The same also applies to opening the faucet. Simply put, it helps prevent any water spillages from happening.
Step 2: Locate & Remove The Old Faulty Saddle Valve
With the main valve shut off, it’s time to deal with the defective saddle valve. To be more precise, it is time to locate and remove the old faulty saddle valve.
In addition to removing the defective saddle valve, you should as well clean the pipes. You can clean the pipes using a paper towel and steel wool.
Step 3: Cut Out The Pipes
With the faulty saddle valve removed, it is time to cut out a properly sized section of your pipe. In case you are wondering where to cut, you’ll need to make a cut where the faulty saddle valve used to be.
Remember to cut each end very carefully. Sharkbite usually offers a special tool that deburrs the end of pipes. This helps in ensuring that your cuts are even.
With regards to the tool, ideally, you should make the cuts using a tube cutter. A tube cutter not only makes the job easier but it also helps to yield a straight cut.
Not to mention, it is very easy to use. If you don’t have a tube cutter, you can settle on a hacksaw. This will, however, make your work hard, considering that the pipes will keep shifting with every hacksaw move.
Even worse, you might not have the same cuts measurement-wise. Regardless of the tool you end up using, make sure that the cuts you make are no longer than 2 inches.
A deburring tool should help you get it right with your cuts.
Step 4: Sand The Pipe Ends
Once you’ve made the correct cuts, it’s time to sand them. Fine sandpaper should help you get everything smooth and clean.
Once you get everything smooth and clean, you’ll need something to wipe off the dirt. A paper towel comes in handy here. Gently use it to wipe across the area you have used the sandpaper on.
Step 5: Fit In The Sharkbite
Every Sharkbite fitting comes with a tube stiffener. To properly fit in a Sharkbite where you’ve removed a saddle valve, you’ll need to first fit this in (tube stiffener).
This makes the process of pushing in the tubing easier. If you are worried about depth when fitting the Sharkbite you can use the deburring tool as a gauge depth.
Remember to make small markings on the tubing. This way, when you insert it in the fittings you’ll know for certain that the tubing has gone deep and that you have an ideal seal.
Step 6: Switch The Water Back On
The last step is switching the water back on. A very simple step, right? Keep in mind that this is usually the moment of truth. In case you made any errors, this is where you’ll see the results.
If you did everything correctly, everything should work just fine. In fact, they’ll be working much better than before. If there is a leak, chances are you did not tighten the nuts.
Not to worry, there is a very simple fix to this. Simply tighten the nuts a bit more. Do this until it stops leaking.
Conclusion
As with any other DIY project, replacing the saddle valve with Sharkbite is not that difficult. With the right tools and following the right step, you should be able to replace just about any saddle valve with Sharkbite like a pro.
If once you have completed your DIY project, a problem persists, let’s say a leak, it is advised that you do two things. One, you can opt to repeat the entire process one more time or seek the services of a professional.
If, after several attempts, the problem persists, you should seek the services of a professional plumber.

")


