Homemade wood preservatives are solutions made from readily available, often natural ingredients that help to protect wood from rot, insects, and other forms of decay.
They offer an alternative to commercial solutions, which may contain harsh chemicals.
Choosing homemade wood preservatives over store-bought options can have several benefits.
First, they can be more cost-effective, as many of the ingredients required may already be in your pantry.
Additionally, they give you control over what goes into your preservative, allowing you to avoid harmful chemicals and opt for more environmentally friendly solutions.
Ingredients for Homemade Wood Preservatives
Essential Ingredients You Will Need
For most homemade wood preservatives, you will need the following essential ingredients:
Vinegar: This common household item helps to kill bacteria and fungi that can cause wood decay.
Borax: Also known as sodium borate, this natural mineral is effective at preventing fungal growth and repelling insects.
Linseed Oil: A popular choice for wood preservation, linseed oil penetrates deep into the wood, providing a protective barrier against moisture.
When selecting ingredients for your homemade wood preservative, it’s important to consider their safety and environmental impact.
For instance, ingredients like vinegar and linseed oil are not only effective at preserving wood but are also safe to handle and have minimal environmental impact.
Preparing Your Homemade Wood Preservative
Gathering Your Tools and Supplies
Before you start making your homemade wood preservative, here are the necessary tools and supplies you should gather:
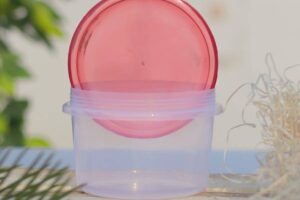
Containers: You’ll need a container for mixing your ingredients and a separate one for storing your prepared preservative.
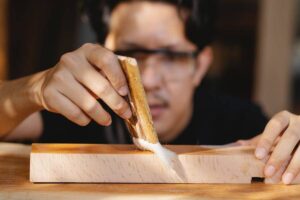
Protective Gear: Safety should always come first. Make sure you have gloves to protect your hands and safety glasses to shield your eyes.
Measuring Tools: Depending on your recipe, you might need measuring cups or spoons to accurately measure your ingredients.
Stirring Utensil: A wooden or metal spoon will be useful for stirring your ingredients together.
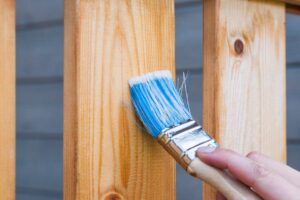
Application Tools: Depending on your preference, you may need a brush or a sprayer to apply the preservative to the wood.
Cleaning Materials: Have some rags or paper towels on hand for cleaning up any spills or messes.
Step-by-Step Preparation Process
Creating a homemade wood preservative involves several steps. Each step is crucial to achieving an effective solution that can protect your wood from decay, insects, and other damaging factors.
Step 1: Gathering Your Ingredients
Before you start, ensure you have all the necessary ingredients for your homemade wood preservative. Depending on the recipe you’re following, this could include vinegar, borax, and linseed oil.
Having everything prepared in advance will make the process smoother and more efficient.
Step 2: Putting on Protective Gear
Safety should always be your first priority when handling any substances, even if they’re as common as vinegar or oil.
Put on your gloves to protect your skin from any possible irritations, and wear safety glasses to shield your eyes from splashes.
Step 3: Measuring Your Ingredients
Accurate measurement of your ingredients is a vital part of the process when creating a homemade wood preservative.
It’s not just about getting the right quantities, but also maintaining the correct ratios as specified in your recipe.
For instance, if your recipe calls for a 1:1 ratio of vinegar to linseed oil, you need to ensure that you measure out equal parts of both.
If you’re using a cup as your measuring tool, this would mean one cup of vinegar to one cup of linseed oil.
When measuring your ingredients, it’s essential to use the right tools. A standard kitchen measuring cup or spoon set can work perfectly for this task.
Remember, using too much or too little of any ingredient can affect the efficacy of your homemade preservative.
It’s also important to note that some ingredients, like borax, may need to be dissolved in water before being added to the mix.
Always follow the specific instructions for each ingredient to ensure the best results.
Lastly, remember to measure your ingredients carefully and slowly. Rushing through this step can lead to mistakes.
Take your time, double-check your measurements, and you’ll be on the right track to creating a successful homemade wood preservative.
Step 4: Mixing Your Ingredients
The process of mixing your ingredients is just as important as measuring them. This step requires patience and attention to detail to ensure the ingredients are thoroughly combined and ready for application.
Start by gradually adding one ingredient to the other in your chosen mixing container.
If your recipe calls for a 1:1 ratio of vinegar to linseed oil, you might start by pouring in the vinegar first, followed by the linseed oil.
Use a sturdy stirring utensil, such as a wooden or metal spoon, to blend the ingredients together. Stir the mixture in a consistent and steady motion, making sure to reach all areas of the container.
This will help to evenly distribute the ingredients and create a homogeneous mixture.
Depending on the ingredients you’re using, the mixture might initially resist blending. Don’t worry, this is normal.
Keep stirring until you notice the texture starting to change and the ingredients beginning to combine.
If your recipe includes borax, remember that it should be dissolved in water before being added to the mix.
Once dissolved, it can be slowly poured into the mixture while continuously stirring to ensure it blends in well.
The mixing process could take several minutes, so be patient. You’re looking for a smooth, well-integrated solution where no single ingredient stands out.
The end goal is a well-blended preservative that will evenly coat and protect your wood.
Once you’ve achieved the desired consistency, give your mixture one final stir to make sure everything is well combined. Now, your homemade wood preservative is ready for testing and application.
Step 5: Testing Your Solution
Before applying your homemade wood preservative to a large piece of wood, it’s advisable to test it on a small, inconspicuous area first.
Apply a small amount of the solution and let it dry to see how the wood reacts to it. If there are no adverse reactions, you can proceed to apply it to the entire piece.
Step 6: Storing Your Homemade Wood Preservative
If you’ve made more than you need for immediate use, you’ll need to store the rest of your homemade wood preservative.
Pour it into a clean, air-tight container and keep it in a cool, dry place. Be sure to label the container clearly with the date and contents to avoid confusion later.
Step 7: Cleaning Up
After you’ve finished making your homemade wood preservative, don’t forget to clean up your workspace.
Wipe down any surfaces that may have come into contact with your ingredients or the finished product, and wash your tools thoroughly to remove any residue.
Application Process of Homemade Wood Preservatives
Prepping the Wood for Preservation
Before applying your homemade wood preservative, it’s crucial to properly prepare the wood. This includes cleaning the wood surface and ensuring it’s dry and free of dust, dirt, or old paint.
Detailed Steps to Apply Your Homemade Preservative
Applying your homemade wood preservative involves coating the wood surface with the solution using a brush or a sprayer, and then allowing it to penetrate the wood.
Multiple coats may be necessary for optimal protection.
Conclusion
This guide has taken you through the process of making and applying a homemade wood preservative, from understanding why you might choose homemade over store-bought, to selecting and preparing your ingredients, applying the preservative, and maintaining the preserved wood.
By choosing to make your own homemade wood preservative, you’re not only taking a proactive step in caring for your wooden items, but you’re also embracing sustainable and DIY practices.
This choice allows you to have control over what goes into your wood preservative and can contribute to a healthier environment.